When I first heard about the Golden Grahams S’mores Bars Original Recipe, I must admit, I was doubtful. As a professional chef who has spent years perfecting intricate desserts, could something this simple deliver the magic of a campfire s’more? After making these bars three times in one week, I am here to tell you that sometimes the most straightforward recipes create the most extraordinary results.
There is something beautifully nostalgic about S’mores that transcends age and culinary sophistication. These bars capture that essence perfectly, transforming the beloved campfire treat into something you can make year-round in your kitchen. The genius lies in the simplicity, just a handful of ingredients that work together to create layers of flavor and texture, transporting you straight back to summer nights around a fire pit.
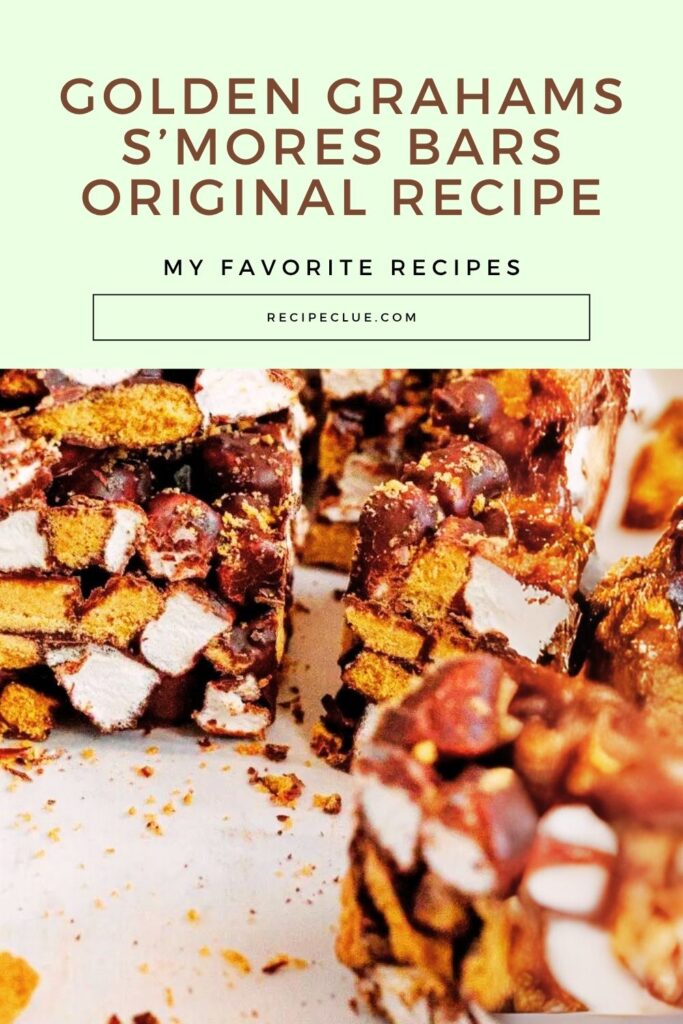
What makes this recipe particularly special is how it balances the three essential S’more components: the graham cracker crunch, the gooey marshmallow sweetness, and rich chocolate indulgence. Unlike traditional s’mores that can be messy and inconsistent, these bars give you the perfect ratio every single time. Trust me, once you make these, you’ll understand why they’ve become my go-to dessert for everything from family gatherings to upscale dinner party endings.
What Does Golden Grahams S’mores Bars Taste Like?
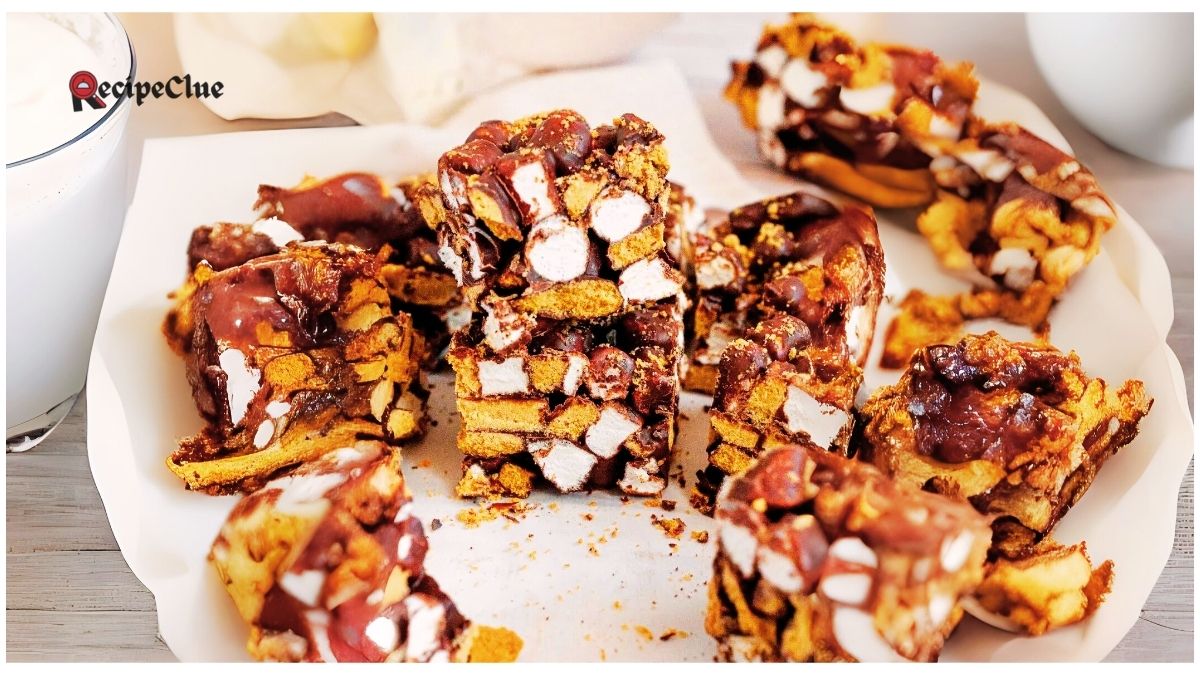
The first bite hits you with that unmistakable chocolate richness, followed immediately by the satisfying crunch of the Golden Grahams cereal. It is like biting into a perfectly constructed s’more, but with more structural integrity and consistent flavor distribution. The semi-sweet chocolate provides just enough sweetness without being cloying, while the coconut oil adds a subtle depth that elevates the entire experience.
The texture is where these bars shine. You get that satisfying crunch from the cereal that gives way to chewy marshmallow pockets scattered throughout. It is not uniformly smooth like a brownie, nor is it as dense as a chocolate bar. Instead, it is this perfect middle ground – substantial enough to feel like a real dessert, but light enough that you will find yourself reaching for just one more piece.
The overall eating experience is pure comfort food nostalgia wrapped in a sophisticated package. Each bite delivers waves of flavor that build and complement each other. The slight saltiness from the cereal enhances the chocolate, while the marshmallows add that signature s’mores sweetness that makes your taste buds sing with recognition.
Ingredients List for Golden Grahams S’mores Bars
- 11.5 oz (about 2 cups) semi-sweet chocolate chips
- 1 tablespoon coconut oil
- 2 to 2½ cups Golden Grahams cereal
- 2 cups mini marshmallows
- Pinch of salt (optional)
- 1 tablespoon cocoa powder (optional)
Kitchen Utensils
- Large microwave-safe mixing bowl
- Silicone spatula or large spoon
- 8×8 inch baking pan
- Parchment paper
- Cooking spray
- Measuring cups and spoons
- Sharp knife for cutting
- Refrigerator space for chilling
Prep Time: 10 minutes
Chill Time: 30 minutes
Serves: 16 bars
How to make Golden Grahams S’mores Bars
Step 1: Melt the Chocolate
In a large microwave-safe bowl, combine chocolate chips and coconut oil. Microwave in 30-second intervals, stirring thoroughly between each burst. This typically takes 60-90 seconds total. The key is patience here – rushing this step can cause the chocolate to seize. Once it is melted and glossy smooth, you are ready to move forward.
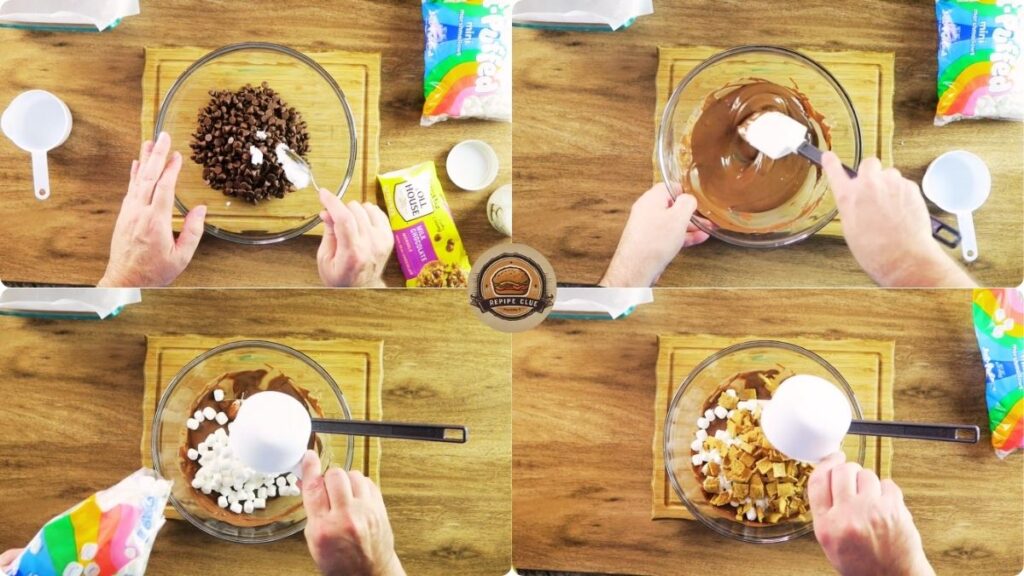
Step 2: Combine the Magic
While the chocolate remains warm, immediately fold in the mini marshmallows and 2 cups of Golden Grahams cereal. Mix gently but thoroughly with a silicone spatula, ensuring every piece gets coated in that beautiful, melted chocolate. If the mixture appears too wet or sticky, gradually add the remaining ½ cup of cereal until you achieve the perfect balance of binding and texture.
Step 3: Prepare and Press
Line your 8×8 pan with parchment paper, leaving it overhanging for easy removal. Lightly spray with cooking spray to prevent sticking. Transfer the chocolate mixture into the prepared pan and use your spatula or clean hands to press it evenly across the surface. Take time to create uniform thickness for consistent bars.
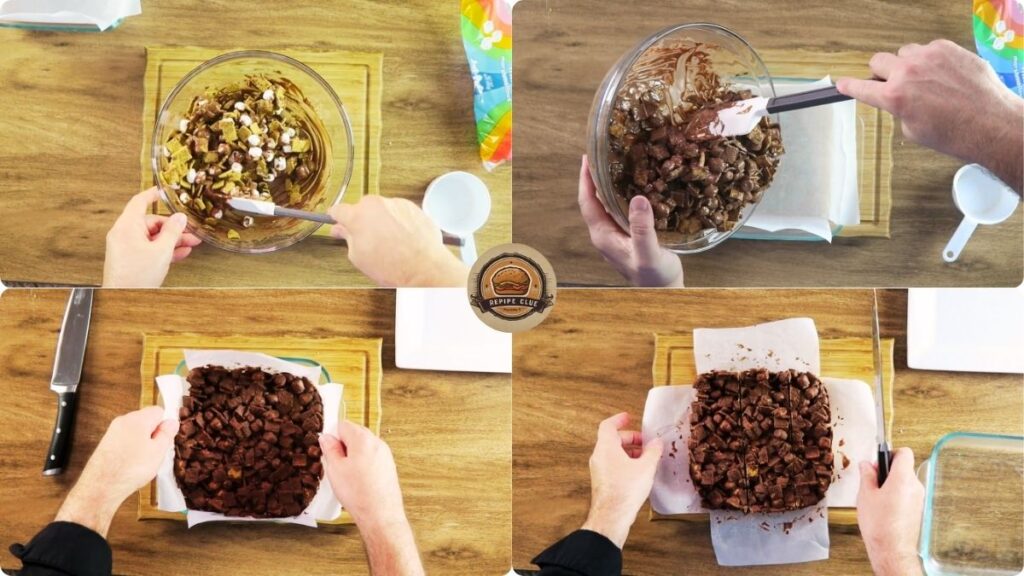
Step 4: Set and Slice
Refrigerate the pressed mixture for at least 30 minutes until firm and set. Once chilled, use the parchment overhang to lift the entire block from the pan. With a sharp knife, cut into 16 even squares. Clean the knife between cuts for the cleanest presentation.
Storage & Reheating Tips
Proper storage is crucial for maintaining the perfect texture of these bars. Store them in an airtight container at room temperature for up to one week, separating layers with parchment paper to prevent sticking. The chocolate coating helps preserve the cereal’s crunch while keeping the marshmallows from becoming too hard. I have found they taste better after the first day, as the flavors have time to meld together beautifully.
For longer storage, these bars freeze exceptionally well for up to three months. Wrap individual bars in plastic wrap, then place in a freezer-safe container. When you are ready to enjoy them, simply remove them from the freezer and let them come to room temperature for about 15 minutes. The texture returns to its original state perfectly, making this an ideal make-ahead dessert for entertaining or meal prep.
You’ll know these bars have gone bad if you notice any white blooming on the chocolate (though this is more aesthetic than safety-related), if the marshmallows become excessively hard or develop an off smell, or if the cereal loses its crunch entirely and becomes stale. If stored properly, these signs will not appear for at least two weeks, but trust your senses – fresh ingredients make the best bars.
Food Pairings with Golden Grahams S’mores Bars
1. Vanilla Bean Ice Cream
Serve bars slightly chilled alongside premium vanilla ice cream. The cold creaminess perfectly balances the rich chocolate and adds temperature contrast that elevates both desserts.
2. Fresh Strawberries
The natural acidity and juiciness of ripe strawberries cut through the sweetness beautifully. Arrange sliced berries around the bars for a restaurant-quality presentation.
3. Hot Coffee or Espresso
The bitter notes in coffee create an incredible flavor bridge with the semi-sweet chocolate. Serve bars with freshly brewed coffee for an afternoon treat that rivals any café dessert.
4. Caramel Drizzle
Warm caramel sauce drizzled over the bars adds another layer of campfire nostalgia. The buttery caramel complements the marshmallow sweetness while adding visual appeal.
5. Toasted Coconut Flakes
Sprinkle toasted coconut over the bars before serving to enhance the coconut oil in the recipe. It adds textural interest and a tropical twist to the classic’s more flavors.
6. Greek Yogurt with Honey
For a lighter pairing, serve small bars alongside Greek yogurt drizzled with honey. The tangy yogurt provides a refreshing contrast to the rich chocolate.
7. Warm Milk
Channel childhood memories by serving these bars with a glass of warm milk. The combination is comfortable food at its finest and perfect for evening dessert.
8. Cinnamon Sugar Popcorn
Create a fun snack board by pairing bars with cinnamon sugar popcorn. Both treats share that perfect sweet-salty balance and create an interactive dessert experience.
9. Peanut Butter
A small dollop of natural peanut butter alongside each bar adds protein and creates that beloved chocolate-peanut butter combination. The nutty richness complements the s’more flavors perfectly.
10. Chamomile Tea
The gentle floral notes of chamomile tea provide a sophisticated counterpoint to the bars’ richness. Serve with delicate teacups for an elegant dessert presentation.
Ready for more sweet treats? Try my Godiva Chocolate Cheesecake and Lemon Cake Recipe next
Expert Tips
1. Temperature Matters
Use chocolate that is warm but not hot when mixing in cereal and marshmallows. Too hot and the marshmallows will completely melt; too cool and the mixture will not bind properly.
2. Measure Cereal by Feel
While the recipe calls for 2-2½ cups, trust your eyes and hands. The mixture should hold together when pressed but still have visible cereal pieces throughout.
3. Line Pan Generously
Create parchment paper overhang on all sides of your pan. This makes removal foolproof and prevents any sticking issues that could ruin your beautiful bars.
4. Press with Purpose
Use steady, even pressure when pressing the mixture into the pan. Uneven pressing leads to bars that crumble when cut. A flat-bottomed measuring cup works great for this.
5. Sharp Knife is Key
Use your sharpest knife and clean it between cuts. Warm the blade slightly under hot water and dry completely for the cleanest cuts through chocolate.
6. Quality Ingredients Count
Invest in good chocolate chips and fresh cereal. Stale cereal will make the entire batch taste off, and low-quality chocolate affects the overall flavor significantly.
7. Room Temperature Assembly
Let your ingredients come to room temperature before starting. Cold marshmallows will not be incorporated as well, and cold chocolate chips take longer to melt evenly.
8. Portion Control Cutting
Cut smaller bars than you think you need. These are rich and satisfying – smaller portions enhance the eating experience and make the batch last longer.
9. Customize Thoughtfully
If adding extras like nuts or dried fruit, reduce the cereal slightly to maintain the proper texture balance. Too many add-ins can make bars fall apart.
10. Patience with Chilling
Don’t rush the chilling process. Properly set bars cut cleanly and hold their shape. If they seem soft after 30 minutes, give them another 15-20 minutes in the refrigerator.
Golden Grahams S’mores Bars Original Recipe
Ingredients
Method
- In a large microwave-safe bowl, combine chocolate chips and coconut oil. Microwave in 30-second intervals, stirring thoroughly between each burst. This typically takes 60-90 seconds total. The key is patience here – rushing this step can cause the chocolate to seize. Once it is melted and glossy smooth, you are ready to move forward.
- While the chocolate remains warm, immediately fold in the mini marshmallows and 2 cups of Golden Grahams cereal. Mix gently but thoroughly with a silicone spatula, ensuring every piece gets coated in that beautiful, melted chocolate. If the mixture appears too wet or sticky, gradually add the remaining ½ cup of cereal until you achieve the perfect balance of binding and texture.
- Line your 8×8 pan with parchment paper, leaving it overhanging for easy removal. Lightly spray with cooking spray to prevent sticking. Transfer the chocolate mixture into the prepared pan and use your spatula or clean hands to press it evenly across the surface. Take time to create uniform thickness for consistent bars.
- Refrigerate the pressed mixture for at least 30 minutes until firm and set. Once chilled, use the parchment overhang to lift the entire block from the pan. With a sharp knife, cut into 16 even squares. Clean the knife between cuts for the cleanest presentation.
Video
Notes
- Proper storage is crucial for maintaining the perfect texture of these bars. Store them in an airtight container at room temperature for up to one week, separating layers with parchment paper to prevent sticking. The chocolate coating helps preserve the cereal's crunch while keeping the marshmallows from becoming too hard. I've found they actually taste better after the first day, as the flavors have time to meld together beautifully.
- For longer storage, these bars freeze exceptionally well for up to three months. Wrap individual bars in plastic wrap, then place in a freezer-safe container. When you're ready to enjoy them, simply remove from the freezer and let them come to room temperature for about 15 minutes. The texture returns to its original state perfectly, making this an ideal make-ahead dessert for entertaining or meal prep.
- You'll know these bars have gone bad if you notice any white blooming on the chocolate (though this is more aesthetic than safety-related), if the marshmallows become excessively hard or develop an off smell, or if the cereal loses its crunch entirely and becomes stale. Generally, if stored properly, these signs won't appear for at least two weeks, but trust your senses – fresh ingredients make the best bars.
Frequently Asked Questions on Golden Grahams S’mores Bars Original Recipe
Here, we’ve got you covered with some common questions about the Golden Grahams S’mores Bars Original Recipe that people often ask.
1. Can I use regular-sized marshmallows instead of mini marshmallows?
Yes, I cut them into smaller pieces first. Large marshmallows do not distribute evenly and can create pockets that are too gooey. Aim for pieces the size of mini marshmallows.
2. What if I do not have Golden Grahams cereal?
Any graham-flavored cereal works well. Honey Maid Graham Crackers crushed into bite-sized pieces also work, though the texture will be slightly different. The key is maintaining that Graham cracker flavor.
3. Can I make these Golden Grahams S’mores Bars dairy-free?
Absolutely! Use dairy-free chocolate chips and ensure your cereal is dairy-free. The coconut oil already makes the recipe naturally dairy-free in terms of fats.
4. How do I prevent the chocolate from seizing in the microwave?
Use 30-second intervals and stir thoroughly between each session. Make sure your bowl is completely dry, and do not let any water meet the chocolate while melting.
5. Can I add other ingredients like nuts or dried fruit?
Yes, it adds no more than ½ cup total of extras and reduces the cereal accordingly. Too many add-ins can prevent the bars from holding together properly.
6. Why are my bars too soft to cut cleanly?
They need more chilling time, or your ratio of chocolate to dry ingredients might be off. Chill for an additional 15-30 minutes, and next time, add a bit more cereal to the mixture.
7. Can I double this Golden Grahams S’mores Bars Original Recipe?
Yes, use a 9×13 pan instead of doubling the 8×8. The bars will be thinner but still delicious. You might need an extra 10-15 minutes of chilling time for the larger pan.
8. How do I store these in hot weather?
Keep them refrigerated during hot weather to prevent melting. Let them sit at room temperature for 5-10 minutes before serving for the best texture.
9. Can I use white chocolate instead of semi-sweet?
White chocolate works, but creates a much sweeter bar. Consider reducing the marshmallows slightly or adding a pinch more salt to balance the sweetness.
10. What is the best way to transport these Golden Grahams S’mores Bars?
Keep them chilled until the last possible moment, then transport them in a cooler with ice packs. Cut them just before serving for the best presentation and texture.
Creating this Golden Grahams S’mores Bars Original Recipe has reminded me why I fell in love with cooking in the first place. Sometimes the most impressive desserts are not the ones with twenty ingredients and complex techniques – sometimes they are the ones that capture a feeling, a memory, a moment of pure joy in every bite. These bars do exactly that, transforming simple pantry staples into something genuinely magical.
I encourage you to make these bars for your next gathering, family dinner, or whenever you need a sweet reminder that simple pleasures are often the best ones. Do not be surprised when they disappear faster than you expected – I have learned to make double batches just to ensure I get to enjoy a few myself.
Try this recipe, share it with people you care about, and let me know in the comments how they turned out for you. Follow me on Pinterest, YouTube and Reddit for more recipes that celebrate the beautiful simplicity of magnificent home cooking, because the best meals are often the ones that bring us back to what matters most.